
Are you ready to change the game with your e-commerce platform?
I wrote this guide for teams who feel constrained by traditional Shopify themes but still want Shopify’s reliability on the backend. As storefront expectations rise and performance becomes non-negotiable, headless Shopify is no longer experimental, it’s a strategic choice.
Industry data shows businesses adopting headless commerce see conversion lifts of up to 40%, largely due to faster storefronts and deeper customization.
This guide breaks down what headless Shopify is, when it makes sense, and how to implement it step-by-step, without overengineering or guesswork.
Shopify has been recognized as a tool enabling businesses of various scales to create and maintain their e-commerce presence. However, did you realize that Shopify extends beyond its usual offerings? It has a specialized version tailored specifically for businesses keen on maximizing the benefits of headless commerce.
Let's talk about Headless Shopify.

What is Headless Shopify?
Headless Shopify refers to an architecture where Shopify powers commerce operations, products, orders, customers, payments, while the storefront is built independently using modern frameworks like React, Next.js, or Hydrogen.
This separation removes theme constraints and allows storefronts to be optimized for performance, UX, and omnichannel delivery without impacting backend stability.
In this setup, you use Shopify purely as a commerce engine that handles all your product information, orders, customer details, and other backend processes. The front end - where your customers interact - is built independently and is not tied to Shopify's templating engine or presentation layer.
Imagine a retail store where the storefront (i.e., the part customers see and interact with) and the stockroom (where all the goods are stored and managed) are in two completely separate locations. You can redesign and update the storefront as you please, without worrying about disrupting the operations in the stockroom. That's exactly what a Headless Shopify setup is like.
This approach significantly differs from the traditional Shopify setup where the front and back ends are integrated into one system, limiting your customization options. With a traditional setup, you're confined to the built-in themes and templates that Shopify provides.
You can certainly customize these to a certain extent, but there's a limit to how far you can go. With Headless Shopify, those limits disappear.
5 Benefits of Using Headless Shopify for Your eCommerce Store

In the e-commerce domain, personalization rules supreme. Your online store is the digital embodiment of your business. The more it mirrors your distinct brand personality, the more it will differentiate you from rivals.
So, let's dive into the five biggest benefits of setting up a Headless Shopify store.
1. Full Customization
Headless Shopify removes presentation limits imposed by themes, enabling teams to design storefronts that prioritize performance, UX, and brand differentiation while keeping Shopify’s commerce engine intact.
2. Omnichannel Selling
Headless Shopify lets you sell via multiple channels (e.g., mobile, web, social media, IoT devices) while keeping your backend operations consistent and centralized. Your customers can shop from anywhere, and you still have a single, unified system to manage all sales.
3. Faster Loading Times
In a headless setup, the front end of your website can be designed for speed and performance. This is crucial as a delay of just one second can lead to a 7% reduction in conversions.
4. Greater Scalability
The headless architecture allows for greater scalability as your business grows. You can add new features, implement new technologies, and integrate new systems without disrupting your existing operations.
5. Increased Security
As the front and back ends are decoupled in a Headless Shopify store setup, security threats are reduced. An attack on the front end won’t directly compromise your back-end data.
The headless approach with Shopify gives your business the power to adapt and evolve as customer needs and market trends change, ensuring you can consistently deliver exceptional customer experiences.
Setting up a Headless Shopify store might be a little more complex than the traditional Shopify setup, but the benefits it brings are worth it.
Preparation for Setting Up a Headless Shopify Store
Before embarking on the journey to set up a Headless Shopify store, it's crucial to perform some groundwork. Preparation is key to a smooth headless commerce transition. This process requires you to take into account a few important considerations that will largely influence the success of your headless venture.
So, what exactly do you need to consider? Here's a handy table to guide you through the preparation phase.
| Consideration | Why It's Important |
Budget | Transitioning to a headless setup might require a significant investment. Take into account costs like development, hosting, and maintenance. |
Technical Skills | Managing a headless store requires technical know-how. If you lack these skills, consider hiring a developer. |
Hosting | In a headless setup, you'll need to host your front end independently. Evaluate reliable hosting providers that suit your needs. |
SEO | Search Engine Optimization is vital for e-commerce. Ensure your new setup adheres to SEO best practices. |
Performance Metrics | Determine what metrics are important to measure the success of your headless store. |
Time | Transitioning to a headless setup can take time. Plan accordingly to avoid business disruption. |
Security | Safeguard your headless setup against potential vulnerabilities and protect customer data. Implement robust security measures and stay updated with security best practices. |
Scalability | Your setup should allow for future growth and expansion. Check whether your proposed system is scalable. |
Content Management System (CMS) | Choose a CMS that seamlessly integrates with Shopify's API and meets your needs. |
Customer Experience | Always prioritizes your customer's experience. Make sure your headless store is user-friendly and intuitive. |
Once you've carefully evaluated these considerations and are confident with your plan, it's time to get your hands on the real deal - Shopify's Storefront API. Before choosing tooling, review composable commerce vs headless to understand boundaries between services and the frontend.
Getting Started with Shopify's Storefront API
The Shopify Storefront API acts as the communication layer between Shopify’s backend and custom storefronts, enabling headless commerce workflows such as product rendering, checkout creation, customer authentication, and cart management across platforms.

This powerful tool lets you pull all the crucial data from the Shopify backend, such as product information, customer data, and shopping cart details, and then display that data on your chosen front-end platform.
Now, let's look into how the Storefront API functions and its key features.
1. Fetch Store Data:
The Storefront API retrieves data directly from your Shopify store. It fetches product information, customer data, and shopping cart details to create a seamless and personalized shopping experience.
2. Customize Checkout:
The Storefront API lets you create unique and branded checkouts to reflect your store’s aesthetic. It gives you full control over your checkout process, allowing you to differentiate your brand.
Your Store, Open for Business - Fast
Custom Shopify builds that convert browsers into buyers.
3. Sell on Various Platforms:
With the API, you can integrate Shopify’s functionalities onto various platforms. You can sell your products on any website, app, or even video game. For instance, in 2022, Shopify announced its integration with TikTok, enabling businesses to sell directly within the app.
4. Customer Accounts:
You can enable customer account creation, allowing customers to store their information for a quicker checkout experience in the future.
5. SEO Compliance:
The API is built to be SEO-friendly. It ensures that the products in your store are easily discoverable by search engines, thereby driving more organic traffic.
6. Support for Multiple Currencies:
The Storefront API allows your store to support multiple currencies, making it more accessible to international customers.
7. Integration with CMS:
You can integrate the Storefront API with any CMS of your choice, giving you complete control over your content.
The Shopify Storefront API is the engine that powers your headless Shopify store setup. It provides a blend of adaptability, scalability, and complete customization, making it an ideal choice for businesses seeking to offer exceptional customer experiences across different platforms.
Once you've successfully set up your Shopify Storefront API, it's time to invigorate your store with an innovative, responsive design. This is where Tailwind CSS and Next.js come into play. They form a potent duo for creating an intuitive and eye-catching storefront.
Tailwind CSS is a highly customizable, utility-first CSS framework that offers a deep level of control over your website's aesthetics. It allows you to design intricate, responsive interfaces with minimal CSS.
On the other hand, Next.js is a React framework that enables features such as server-side rendering and generating static websites, plus you can boost site engagement with dynamic Open Graph images, making it an excellent choice for high-performance e-commerce sites.
Creating an Engaging Storefront with Tailwind CSS and Next.js: A Step-by-Step Walkthrough
Creating a compelling and user-friendly storefront using Tailwind CSS and Next.js can be accomplished by following these pivotal steps:
1. Establish a Next.js Project with Tailwind CSS
Various methods are available to create a Next.js project, but the following command proves to be swift and efficient:
npx create-next-app -e with-tailwindcss your-next-shop
cd your-next-shop
2. Form a Shopify Partners account and initiate a new store
Head over to Shopify Partners and establish your Shopify Partners account if it doesn't exist already.
Afterward, look for the 'Stores' tab located on the left panel and initiate a new store.
A Partners account not only lets you effortlessly administer stores but also provides unlimited time to work on them before transferring to a client.
3. Link the Shopify store to the Next.js application
Find the 'Apps' tab in your store and select the "Manage private apps" link at the bottom:
3. Link the Shopify store to the Next.js application
Find the 'Apps' tab in your store and select the "Manage private apps" link at the bottom:

Accept the stipulated terms and conditions, label your private app as "Next.js Connection" and input your email address. Then, scroll down and enable the checkbox for "Allow this app to access your storefront data using the Storefront API".

In the root folder of your Next.js application, construct a .env.local file and include the following variables:
SHOPIFY_STOREFRONT_ACCESSTOKEN='storefront api access token'
SHOPIFY_STORE_DOMAIN='yourstore.myshopify.com'
4. Incorporating Shopify GraphiQL App
At this stage, you'll need to add the Shopify GraphiQL App. This tool allows you to test your queries before implementing them in your app. Head to the Shopify GraphiQL App, select all scopes for Storefront API access, and then install the app. Make sure you've already added some sample products to your store that are available for the GraphiQL App sales channel.
5. Procuring Products in Next.js Storefront
Here, you're essentially setting up a system to fetch product data from Shopify. You will create a new file called 'shopify.js' in a new folder named 'lib' in your project's root directory. This file is tasked with making requests to the Shopify API to fetch data.
6. Showcasing Products on Homepage
Finally, it's time to display the products on your homepage. In your 'index.js' file, you'll fetch the product data and pass it to your homepage. You will also create a new component called 'ProductCard.js' in a new 'components' folder.
This component is responsible for displaying a single product card. You'll then iterate over your list of products, displaying a ProductCard for each product on your homepage. For an enhanced user experience, consider implementing a sticky add to cart feature, which can significantly improve conversion rates by making it easier for customers to add items to their cart from any point on the page.
And voila!
You've just created your basic Shopify Next.js Storefront. With the design powered by Tailwind CSS and the dynamic product fetching capabilities of Next.js, you're well on your way to creating a compelling online shopping experience.
Best Practices for Design, Referencing Shopify's Design Resources
When designing your storefront, always aim for a seamless user experience that aligns with your brand’s identity. Shopify's design resources are a wealth of knowledge for implementing design best practices in your headless Shopify store setup. Some tips to consider include:
Maintain Consistency: Consistency in design helps your brand look professional and trustworthy. Ensure all buttons, typography, colors, and other elements align with your brand guidelines.
Mobile-First Approach: With the rise of mobile commerce, your design should prioritize mobile devices. Tailwind CSS’s responsive design features can help with this.
Simplicity is Key: A clutter-free, easy-to-navigate website goes a long way in enhancing the user experience. Avoid overwhelming your customers with too many elements.
Use High-Quality Images: Crisp, clear images can significantly boost your store's appeal. Make sure your product images are of high quality and display the product details.
Fast Loading Times: Speed is critical in e-commerce. Optimizing your images, minifying your code, and leveraging Next.js's performance features can help achieve this.
Tailwind CSS and Next.js can significantly streamline the process of designing your Headless Shopify storefront. With these resources and best practices at your disposal, you're well on your way to creating a compelling, customer-friendly e-commerce store.
Creating the Frontend of Your Headless Shopify Store
The adventure of setting up your headless Shopify store is incomplete without diving into its two new companions: Hydrogen and Oxygen.
So, what are these elements doing in the Shopify ecosystem?
Hydrogen is Shopify’s React framework designed to build custom storefronts, while Oxygen is Shopify's hosting platform for Hydrogen stores. Together, they revolutionize the way you create and host your Shopify storefronts.
Hydrogen, inspired by Next.js, provides a set of components to help you build your custom storefront. It includes pre-built components like ProductGrid, ProductTitle, and VariantPicker that adhere to Shopify's design system, Polaris. You can customize these to your heart's content. Hydrogen also takes care of common storefront needs like routing, state management, and server components.
The other part of the equation is Oxygen, a hosting solution optimized for Hydrogen-based Shopify storefronts. Oxygen is built for speed and ensures a seamless global delivery of your storefront.
Your Store, Open for Business - Fast
Custom Shopify builds that convert browsers into buyers.
This symbiotic relationship between Hydrogen and Oxygen offers numerous advantages for creating your front:
Speed: Hydrogen apps hosted on Oxygen are fast. The Server Components render on the edge, close to the customer, making the app's interactive elements load incredibly fast.
Flexibility: With Hydrogen, you have the freedom to design your storefront according to your brand guidelines, without any constraints.
Scalability: Oxygen ensures that your storefront can handle peak traffic moments, as it is built on top of a global edge network.
Building a custom storefront using Hydrogen and Oxygen is as exciting as it sounds, opening a new dimension of creativity and performance for your headless Shopify store setup.
Integrating Shopify into a React Application
You might wonder when and why you should contemplate incorporating Shopify into a React application. If your goal is to have the liberty to fully personalize your online store and harness the potency of React, then integrating Shopify within your React app becomes a feasible path.
To integrate Shopify with a React application, the Shopify-React-App repository on GitHub comes in handy and for comprehensive setup guidance, check our guide on Integrating GitHub with Your Shopify Store. This library has been crafted to ease the process of linking a Shopify store with a React app. It equips you with a Shopify context, simplifying the task of importing it into your application. It gives you all the necessary utilities to pull product information, add items to the cart, and manage checkout procedures.

The integration process starts by cloning the Shopify-React-App repository. You then need to create a .env file to securely store your Shopify Storefront API credentials.
Then, using the Shopify Provider component, you can wrap your application to gain access to all Shopify features. Now you're set to pull in your product data and create dynamic product pages using React components!
Integrating the Frontend & Backend
Bridging your frontend application with the Shopify backend is the final piece of the headless commerce puzzle. This integration is facilitated by the Storefront API, acting as a messenger between the two ends.

Here is a step-by-step guide on how to achieve this:
Create a Storefront API Token: You can create this token in your Shopify admin panel. It will be used to authenticate your requests to the API.
Send Requests to the Storefront API: Use this token to send requests to the API. You can fetch product data, create checkout sessions, and manage customer accounts.
Display the Data on Your Frontend: Use the data returned from the API to populate your product pages, shopping cart, and other components of your storefront.
During this process, you might encounter some common issues. Handling rate limits is one of them. Shopify limits the number of API calls you can make in a specific time frame to protect the server's performance. Use a technique called 'throttling' to manage your API requests within these limits.
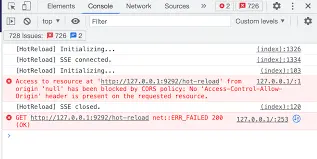
Another common issue is dealing with CORS (Cross-Origin Resource Sharing) errors. You might encounter these when your front end tries to make a request to the Shopify API from a different domain. To solve this, you can set up a proxy server to route your API requests.
Going Live and Managing Your Headless Shopify Store
Congratulations!
You have journeyed through the complex yet captivating landscape of setting up a headless Shopify store. Now, it's time to raise the curtains and unveil your digital masterpiece to the world. However, the journey does not end with launching your store; managing and optimizing your headless setup is a continuous endeavor.
Managing a headless Shopify store requires a balanced blend of technical acumen and e-commerce expertise. Tasks like frequent content updates, SEO optimization, website performance tracking, assuring a flawless customer journey, and troubleshooting technical glitches are all part of the deal.
While you get the liberty to modify and manage every facet of your store, managing these tasks can become overwhelming, particularly when your primary focus should be on business expansion. That's when expert assistance can prove beneficial.
F22 Labs specialize in headless e-commerce development and can assist you in managing your headless Shopify store. We not only help with the initial setup but provide ongoing support to ensure your store runs smoothly and effectively. From handling API integrations to optimizing your store's performance, their expert team can be a valuable partner in your e-commerce journey.
FAQs
1. When should a business choose headless Shopify?
When storefront customization, performance, or omnichannel delivery becomes limited by Shopify themes.
2. Is headless Shopify suitable for small stores?
Only if technical resources or long-term scalability justify the added complexity.
3. Does headless Shopify improve SEO?
Yes, when implemented with SSR, structured metadata, and optimized performance.
4. What frontend frameworks work best with headless Shopify?
Next.js, Hydrogen, and custom React setups are most commonly used.
5. Is Shopify Hydrogen mandatory for headless commerce?
No. Hydrogen is optional; Storefront API works with any compatible frontend.
Final Thoughts
Headless Shopify is not about rebuilding commerce from scratch. It’s about decoupling presentation from operations so storefronts can evolve without backend friction.
For brands focused on performance, scalability, and omnichannel growth, headless architecture provides long-term flexibility that traditional theme-based setups struggle to match.
When implemented with the right tooling and clear boundaries, headless Shopify becomes a foundation, not a liability, for future growth.

Murtuza Kutub
A product development and growth expert, helping founders and startups build and grow their products at lightning speed with a track record of success. Apart from work, I love to Network & Travel.