
WebHook integration with Stripe Payment Intents
When integrating payment gateways like Stripe, Razorpay, or Dwolla, developers often encounter the concept of webhooks. While working on a Rails-based payment integration, I realized that understanding webhooks clearly is essential for handling payment events reliably and securely.
Payment providers rely on webhooks to notify your application when important events occur, such as successful payments, failed transfers, or updates to customer accounts.
In this article, we will cover the following:
• What a webhook is
• How to integrate a webhook with Stripe Payment Intents
The goal is to help developers understand how webhook endpoints work and how to implement them correctly inside a Rails application.
What is a WebHook?
A Webhook is an HTTP callback triggered when a specific event occurs in an external system.
Unlike traditional API interactions where a client sends a request and waits for a response, webhooks work differently. The request is initiated automatically by the external service when an event happens.
In the context of payment providers such as Stripe, the provider sends an HTTP POST request to a predefined endpoint in your application whenever events like payments, transfers, or account updates occur.
This allows your application to react to payment events in real time without continuously polling the payment API.
WebHook integration with Stripe Payment Intent

To use webhooks, you first need to register an endpoint URL with the payment provider.
This endpoint is a route within your application that receives webhook requests whenever specific payment events occur. For example, when a customer creates a transfer, adds a bank account, or completes a payment, the payment provider sends event data to this endpoint.
A recommended practice is to log all incoming webhook requests and process only the events that are relevant to your application.
For example, you may only need to handle events such as:
• customer_bank_transfer_completed
• customer_bank_transfer_failed
Processing only relevant events ensures that your payment records are updated accurately without unnecessary processing.
Let’s Build Your Web App Together!
We build fast, scalable, and secure web applications that help your business grow. From idea to launch, we handle it all.
When integrating with Stripe Payment Intent API, the webhook endpoint must be configured to receive and process event payloads sent by Stripe.
The following steps outline the basic webhook setup inside a Rails application.
- Create a model named Webhook with attributes such as
eventandevent_type. - Create a controller named webhook_controllers.rb.
- Add a
createaction that processes incoming webhook events. - Define the webhook route inside the
config/routes.rbfile.
resources :webhooks, only :createThe migration will look like:
class CreateWebhooks < ActiveRecord::Migration[6.0]
  def change
    create_table :webhooks do |t|
      t.json :event
      t.string :event_type
      t.timestamps
    end
  end
end
Paste the following code inside webhook_controllers.rb
def create
      payload = request.body.read
      begin
        event = Stripe::Webhook.construct_event(
          payload, signature_header, endpoint_secret
        )
      rescue JSON::ParserError => e
        # Invalid payload
        render json: {success: false, message: "Invalid payload"}, status: 400 and return
      rescue Stripe::SignatureVerificationError => e
        # Invalid signature
        render json: {success: false, message: "Invalid signature"}, status: 400 and return
      end
json_data = JSON.parse(event.to_json)
      stripe_webhook = Webhook.create!(event: json_data, event_type: json_data["type"])
      render json: {success: true, message: "successfully stored"}, status: :ok
  end
private
def signature_header
      request.env['HTTP_STRIPE_SIGNATURE']
  end
def endpoint_secret
       Rails.application.credentials.stripe.dig(:webhook_endpoint_secret)
  end
You will find endpoint_secret in the stripe dashboard. First, log in to the dashboard, click on test mode then go to Developers -> Webhooks -> signing secret as shown in the image. Click to reveal.

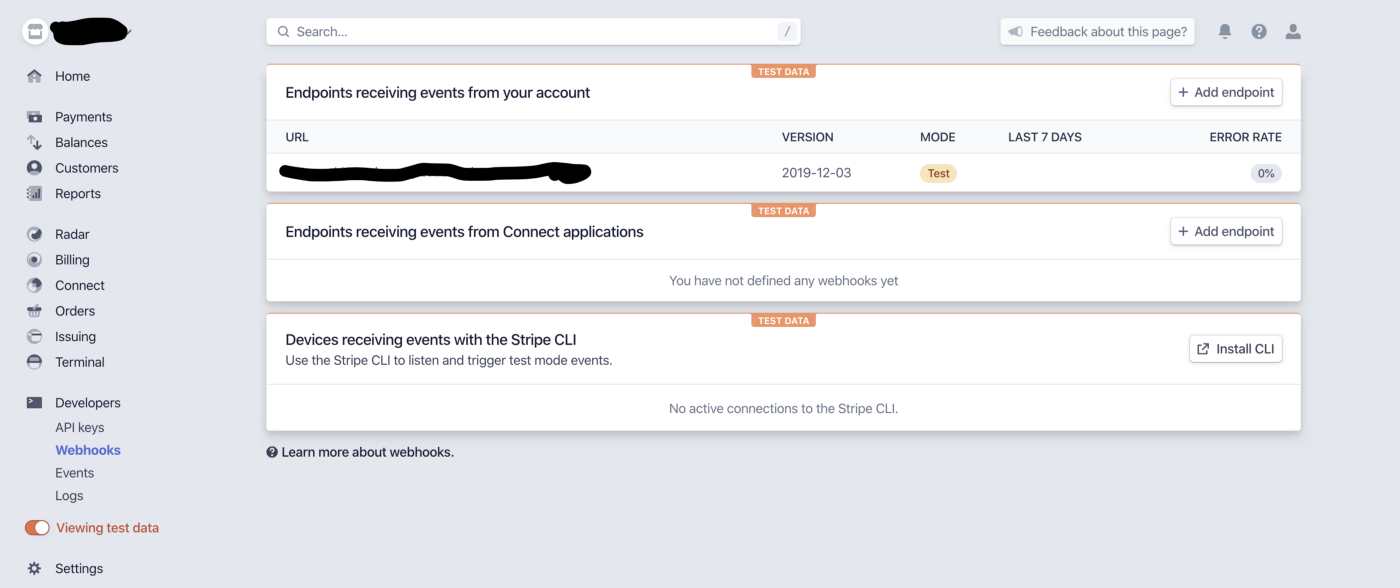
Next, register your webhook endpoint inside the Stripe Dashboard.
For example, if your webhook endpoint is:
https://mydomain.com/webhooks
Add this URL in the Stripe dashboard and select the events your application should receive.
These events determine when Stripe will send webhook notifications to your server. After configuration, Stripe allows you to send test webhook events to verify that your endpoint is correctly receiving and processing requests.
Testing webhook delivery is important to ensure your application correctly handles event payloads before moving to production.
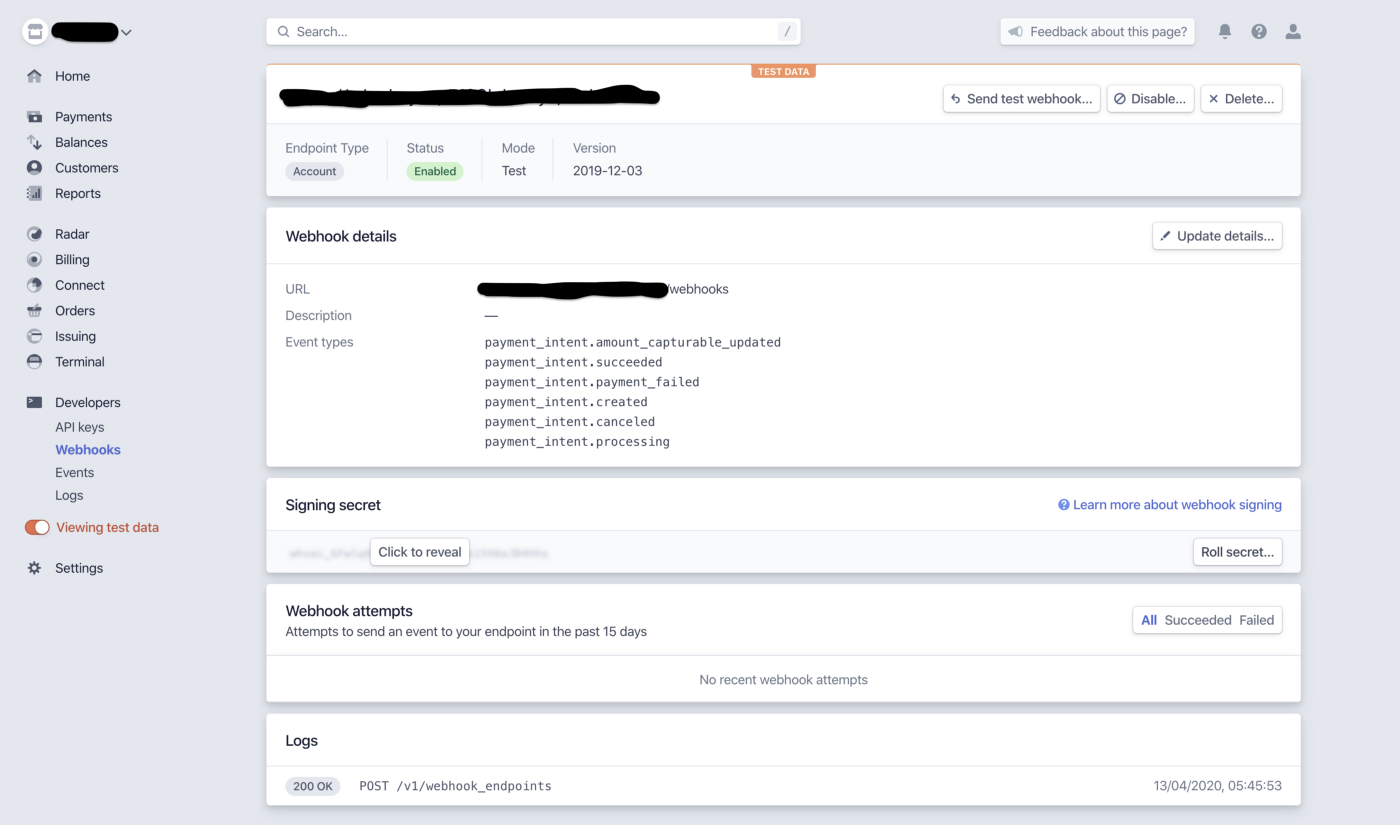
After setting up everything, you can send a test webhook and test your endpoint whether it is working perfectly or not.
Let’s Build Your Web App Together!
We build fast, scalable, and secure web applications that help your business grow. From idea to launch, we handle it all.
FAQ
What is a webhook in Stripe?
A Stripe webhook is an HTTP callback that sends event data to your server when payment-related events occur, such as successful payments or failed transactions.
Why are webhooks required for Stripe payment integration?
Webhooks allow applications to receive real-time notifications about payment events without continuously polling the Stripe API.
What events can Stripe webhooks send?
Stripe webhooks can send events such as:
- payment_intent.succeeded
- payment_intent.failed
- charge.succeeded
- customer.created
How do you verify Stripe webhooks?
Stripe verifies webhook requests using a signature header that ensures the event payload originated from Stripe.
Where do you find the webhook signing secret in Stripe?
The webhook signing secret can be found in the Stripe Dashboard → Developers → Webhooks → Signing Secret section.
Conclusion
Webhook integration plays a critical role in building reliable payment workflows. By receiving real-time event notifications from Stripe, applications can update payment states, trigger internal processes, and maintain accurate financial records.
Setting up a webhook endpoint correctly ensures that payment events are captured securely and processed efficiently within your application.
Once configured, webhooks allow your system to respond automatically to payment updates without repeatedly querying the Stripe API.

Murtuza Kutub
A product development and growth expert, helping founders and startups build and grow their products at lightning speed with a track record of success. Apart from work, I love to Network & Travel.


